
You’ve just gotten home from work. You’re walking up the driveway toward the front porch, ready to step inside after a long day. Then something catches your eye — the front door. For the first time, you notice it’s covered in chips and scratches from all the natural elements that have hit it over the years. Suddenly, you’re wondering how many of your neighbors and visitors have already noticed.
One of the benefits of exterior doors is their curb appeal, but that tends to be lacking if your door is in rough shape. Maybe the damage is something that can be hidden with a fresh coat of paint. If it’s bad enough, you may want to install a new door altogether. But how do you put in a new door?
The first step toward door installation is knowing which kind of door you need. Then comes the process of installing it. Below, we’ll take a look at both.
Buying the Right Exterior Door
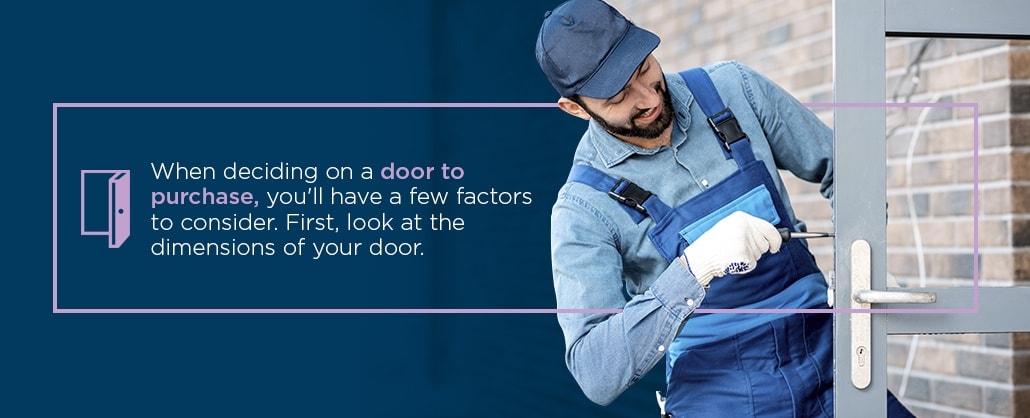
When deciding on a door to purchase, you’ll have a few factors to consider. First, look at the dimensions of your door. This element is the most straightforward — you need a door that will fit the opening in your house. Before you go door-hunting, measure the dimensions of your current door and frame.
The second factor is equally simple — direction. If you’re ordering a pre-hung door — which is preferable to a slab door when it comes to exterior doors — it will already be attached to the frame and will swing in a particular direction relative to the house. You need to make sure you get one that swings in the same direction as your current door. So, if your door opens inward and has the knob on the right-hand side, make sure the new door fits that description as well.
Thirdly, decide what material you want for the door. There are a few different options available, including the following:
- Wood: Wood doors are the most common type and have the broadest range in appearance. However, they must have a good finish to prevent water damage.
- Aluminum: Though they tend to be sold solely through dealers, aluminum doors carry the advantage of a baked-on finish that prevents them from rusting.
- Steel: Steel is the strongest of the available options and requires minimal effort to maintain. Homespire’s ENERGY STAR®-rated doors are made with 20- to 22-gauge seamless galvanized steel. They are also filled with Poly-Core insulation that keeps your home comfortable and secure.
- Fiberglass: Fiberglass doors are made to look like wood doors, but they’re stronger, more affordable, and require less maintenance than wood doors. They are not as strong nor require less maintenance than steel doors, though.
Factors like maintenance level, price, and appearance will vary across these different types, so make your choice based on your priorities. Once you’ve reached a decision and recorded your necessary observations about the current door, take this information with you to shop for your new door. Aim to find and order something that fits each of the criteria you came up with.
To get a feel for the types of options you may have, take a look at a selection of the doors Homespire Windows and Doors offers.
A 5-Step Guide to Installing Exterior Doors
Once you’ve decided on an exterior door and had it delivered to your house, you’re ready to install it. Door installation can be a daunting task, especially if you don’t have much experience with home maintenance. For those confident in their abilities, here’s a step-by-step guide for how to replace your exterior door:

1. Prep the Door Opening
Throughout the process of installing the door, you’ll want to verify that it fits correctly into the opening. Check for the proper fit at the start by taking some initial measurements. Though you likely took measurements earlier to make sure you ordered the right size door, it’s a good idea to make sure everything lines up the way it’s supposed to before you are too far along in the process.
You’ll want to take four main measurements, including:
- Door size: Door size is the most straightforward measurement. Simply measure the door’s width and height.
- Jamb width: The jamb is the panel on each side of the door frame that sits between it and the wall. When you measure it, be sure to measure only the width of the jamb without extending past it to the trim on either side.
- Rough opening: From the interior, measure the distance from one side of the door opening to the other from left to right. This measurement differs on the interior and exterior of the door, so make sure you’re measuring from the inside.
- Exterior opening: Once you’ve measured the rough opening, repeat the same process on the exterior side of the door. On both of these, be sure to measure the full distance across. You may have to remove the trim.
After taking these measurements on your current door, remove the new door from its packaging and repeat them there to verify the two match up reasonably well.
2. Remove the Old Door Frame
Once you’ve made sure the measurements are the same for both doors, you can begin the replacement process. You’ll start by removing the old door from the house, which begins with the door, then the trim, and the jambs:
- Door: Using a hammer, tap the pins out of the hinges. Then carefully lift the door out of the frame and lay it down on the ground. If you lay it down inside the house, be sure you have a canvas or something to lay it on so it doesn’t scratch the floor.
- Trim: You may have already removed some of the trim to measure the opening. Either way, take the time to remove the rest. Consider using a putty knife to protect the wall as you do so.
- Jambs: At this point, the only part of the door frame still attached to the house are the jambs. To remove these, it’s best to start by cutting through the side jambs with a saw, and then pulling all the pieces out.
Once you’ve done this, the old door should be completely removed.
3. Test-Fit and Center the Door and Frame
The next thing to do is check the fit of the new door in the hole you vacated. If your new door is pre-hung, you can simply slide it into the opening and see how well it fits. Check for gaps between the frame and the wall. In particular, you may have a sizable gap above the door frame. If you do, it could indicate the door is sitting too low relative to the house, which could prevent it from opening.
The best way to fix this issue is to build up the sill underneath the door. You can do so using a piece of wood, placing wooden shims beneath it as needed to produce just the right level of snugness. Be sure it’s level, or you’ll end up with a lopsided door. It’s also a good idea to place a layer of flashing tape over the finished sill, as it will guard against water.
If your door frame is a bit too large to fit, you’ll have to cut it down to size. To do so, first center the door as much as you can against the opening. Then, trace the outline of the frame onto the molding and move the door out of the way, so you can see how much will need to be cut off. Sand down or shear away the molding at those places until you’ve reduced it by enough to insert the door.
Once you’ve made the necessary adjustments, test-fit the door again. If it fits well enough vertically, go ahead and remove it. Any remaining gaps can be fixed in the next step. As a final addition, apply building paper around the inside of the opening as a moisture barrier.
4. Install the Door
With the opening fully prepared, you can begin the process of installing the new door. To do so, follow the steps below:
- Apply caulk: Run caulk along the top of the sill, as well as a thin bead all the way up each side of the opening. Be prepared for the fact that this process may require a lot of caulk.
- Reinsert the door: Slide the new door into the opening. Make sure you center it, so there’s the same amount of space on both sides.
- Apply shims: Fill the gaps on either side of the door frame using wooden shims. Apply these evenly on both sides, until the door is no longer able to shift from side to side. Then cut the shims down so they’re not sticking out the back of the door frame.
- Remove brackets: Your door may have retaining brackets where the door meets the frame, preventing it from opening. If it does, remove them.
- Replace hinge screws: When you open the door, there will likely already be screws holding the hinges to the frame. But the screws are only long enough to hold those two elements together. Replace each of them with longer screws that secure the frame to the house.
- Insert nails: To add an additional anchor to the door frame, tack nails through the inside border of it and into the wall, much like you did with the hinge screws. Focus them on the spots where you have shims holding the frame in place.
Once the door is fully anchored to the house, you’re ready to move on.
5. Insulate and Install the Trim
The final step involves cleaning up the spots where the door frame meets the house, which starts with applying insulation. The gaps around the door frame are kept in place by shims, but they’re not filled in. To seal them off, apply caulk or expanding foam around the border of the frame. It may be helpful to insert a rod of foam backer into the gaps before covering it with the caulk.
Once the door is insulated, it’s time to add new interior trim. If your old trim is still in good condition after being removed, you can reapply it. Either way, place it over the border of the frame as a final layer of insulation.
After that, you’re free to make any finishing touches you deem necessary. If the sill is rather high off the floor, you can install a beveled piece of wood as a transition between the two. If you haven’t attached the lock and knob to your door yet, do that now as well.
Hiring a Professional
After reading through these steps, you may be having second thoughts about installing a new door. Maybe you feel you don’t have the skills to do it correctly, or the time to spend working on it. Those are understandable concerns, but they don’t have to stop you from getting your door replaced.

Not everyone who sells replacement exterior doors expects the homeowner to install it themselves. When you purchase a door from Homespire Windows and Doors, our highly-trained technicians will install it for you, replacing the old one quickly and efficiently.
We’ll start by sending a representative to your home to do a complete door analysis and give you a free estimate. Once you know what door you want to have installed, we’ll come out and set it up for you.
We partner with ProVia to manufacture our doors, which are built to top-quality Homespire specifications. These specifications ensure you’ll receive a door with three significant features — energy efficiency, security, and curb appeal:
- Energy efficiency: All our doors are ENERGY STAR rated and optimized to keep your home insulated against outdoor temperatures. This could help you spend less on your utilities when trying to keep your home warm or cool.
- Security: Your doors need to be capable of keeping out intruders. Fortunately, they’re equipped to do just that with security measures like Burglar Guard security plates and tempered safety glass.
- Curb appeal: Plenty of doors can get the job done and look nice, but your home already has an established look. That’s why we offer custom-designed doors that can match your home in both color and texture.
The door you purchase should be high-quality, and so should the way it’s installed. Unlike many businesses, we send our own, highly-trained employees to get the job done rather than contracting someone else. We’re so confident in our ability, that we offer a limited Signature Warranty on both labor and materials for all the doors we install.
Get Your Exterior Door Installed Today

Ready to have your old door replaced, but unsure about doing it yourself? Homespire Windows and Doors has you covered. We’ve provided quality service for numerous homes throughout the Tri-State Region, and we can’t wait to add yours to the list. Our team of professionals will make sure your new door is installed expertly, and we’ll provide a more comprehensive warranty than any other door company.
If you’re ready to find a replacement for your current exterior door, get in touch with us today.
Get 20% Off
PLUS
No Deposit, No Payments, and No Interest for 12 Months*
*By completing the form, I consent to have Homespire Windows and its affiliates contact me to verify my information, schedule an appointment, or inform me of future product updates, which may include marketing. I consent to receive calls or texts that use automated technology or a pre-recorded voice at the phone number(s) provided. Consent is not required to receive goods and services. I can call the phone number found at the top of this web page. Please see our Terms & Conditions. Msg & data rates may apply.